Elementor Pro
Summary
Integrating Growmatik with Elementor Pro’s contact form allows you to send contact data collected through your contact forms to Growmatik.
You need a Growmatik user account to perform this integration. If you don’t have an account yet, sign up to create an account before proceeding.
In this article, you’ll learn how to create a form using Elementor Pro, map its fields to Growmatik attributes and integrate it with Growmatik.
We’ll cover the following topics:
What is Elementor Pro?
Elementor Pro is an extension of Elementor and one of the most popular WordPress website builders. You can download Elementor from the WordPress website or directly from your website’s dashboard. Since the contact form is only available for the Pro version, you should upgrade to Elementor Pro.
How to integrate Elementor Pro with Growmatik
Add a form using Elementor Pro and integrate it with Growmatik
1. Download and activate Elementor and Elementor Pro. Once you’ve done that, you should see them in your installed plugins.

2. Now that the plugins are activated, you can create a contact form on whichever page of your website you choose. Choose the Contact element and drag it to the desired section.

3. When you click on the form you will see the Edit Form section in the Elementor panel on the left side of the page.

4. Click on Actions after submit from the panel. Email is selected from the list by default, which means that if a user clicks on the send button, Elementor will send an email containing the information from the form to the admin of the site. Click on the add action combo box and select and add Growmatik to let Elementor send information to Growmatik.

Note: If you cannot see Growmatik in the action list, it means your website is not fully integrated with Growmatik. In order to fix that please check out how to integrate with Growmatik article.
5. Now you should be able to see the Growmatik section in the edit form panel. Click on it and give your form a name. Then, choose which tags to add to users (these tags are from Growmatik’s tags), and map form fields with attributes from the Field Mapping section.
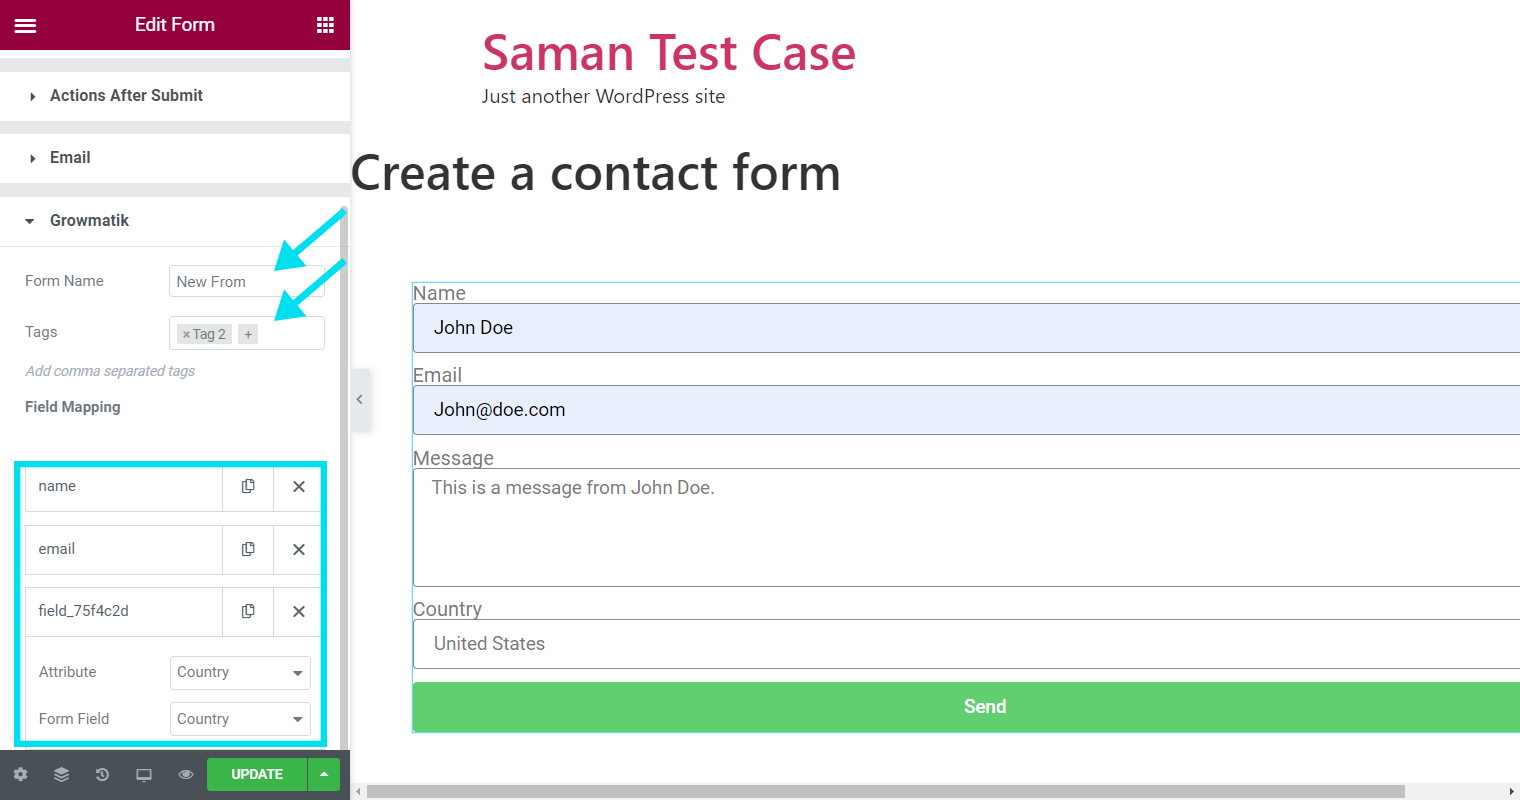
Note: The form name is a required field and must be filled in.
6. The following Growmatik fields can be included in Elementor forms:
- User Name
- Full Name
- First Name
- Last Name
- Billing Address
- Phone number
- Country
- State/Region
- City
- Custom attributes
Note: To see your existing tags or add/remove tags, go to your Growmatik dashboard and click on your avatar to go to Site Settings > People data > tags.

Note: In order to create and see contacts in Growmatik, you need to map the User Email attribute with the Email field from the Field Mapping section.

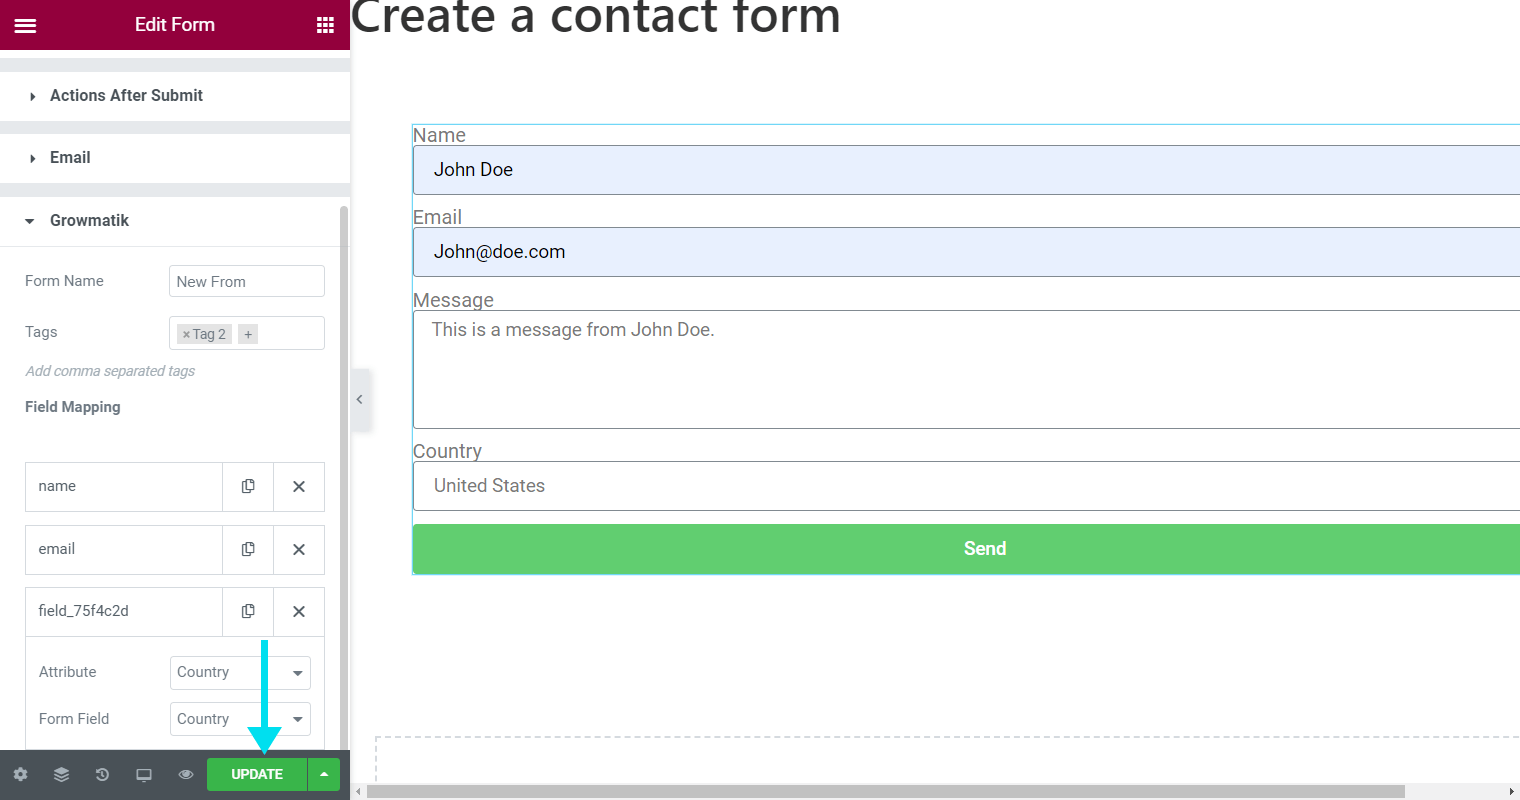
7. You can publish the form by clicking on the UPDATE button.
Locate and filter users in Growmatik
1. Now that your form is connected to Growmatik, when someone fills in and submits the form, the entries will be stored on the People page of your Growmatik dashboard.

2. If you want to see the users that have submitted a specific form, go to the People page and click on Add Filter > User Personal Details.

3. Select Tag.

4. Now you can choose the tag you selected in the Growmatik section of the Elementor contact form.

5. You can now see which users have submitted the form.

If you want to have any automation for the form segments, you need to click on Save Segment when the form is filtered and give it a proper name. You can create any automation for user segments in Growmatik.
